🛡️ What is ClamAV and why use it?
ClamAV is a free, open-source antivirus tool that runs on Linux. It is used to scan files and folders for viruses, trojans, and other malware. Because Kali Linux is often used for security testing, knowing how to use ClamAV is an important skill for every cybersecurity student.
In this lab, we will not use real malware. Instead, we will use the EICAR test file. This is a small text string that every antivirus in the world is built to detect. It is completely safe — it cannot harm your computer — but it lets us test that ClamAV is working properly.
- A Kali Linux machine (we used Kali 2025.2 in VirtualBox)
- A working internet connection
- About 30 minutes
1Install ClamAV
Open a terminal in Kali Linux and run the following commands one by one:
sudo apt update
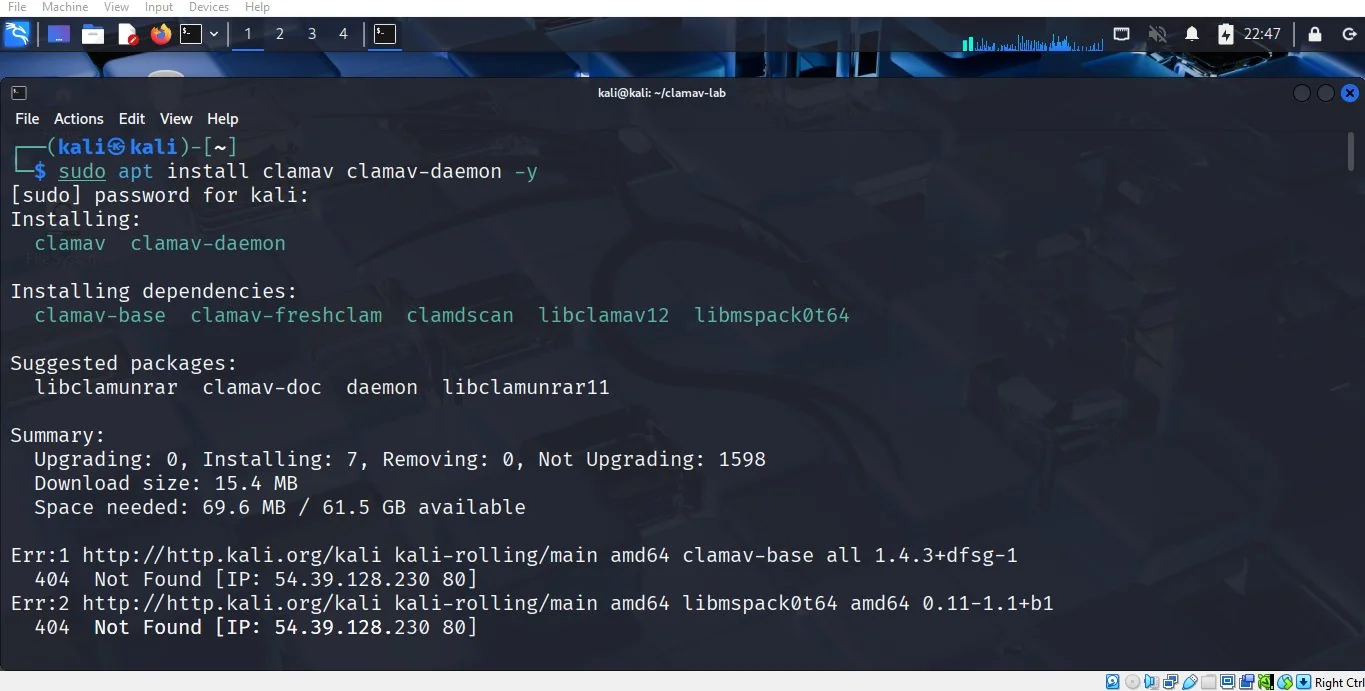
sudo apt install clamav clamav-daemon -yWhen I first ran this command, I got a "404 Not Found" error because my package list was out of date. If this happens to you, do not worry — see the troubleshooting section below.
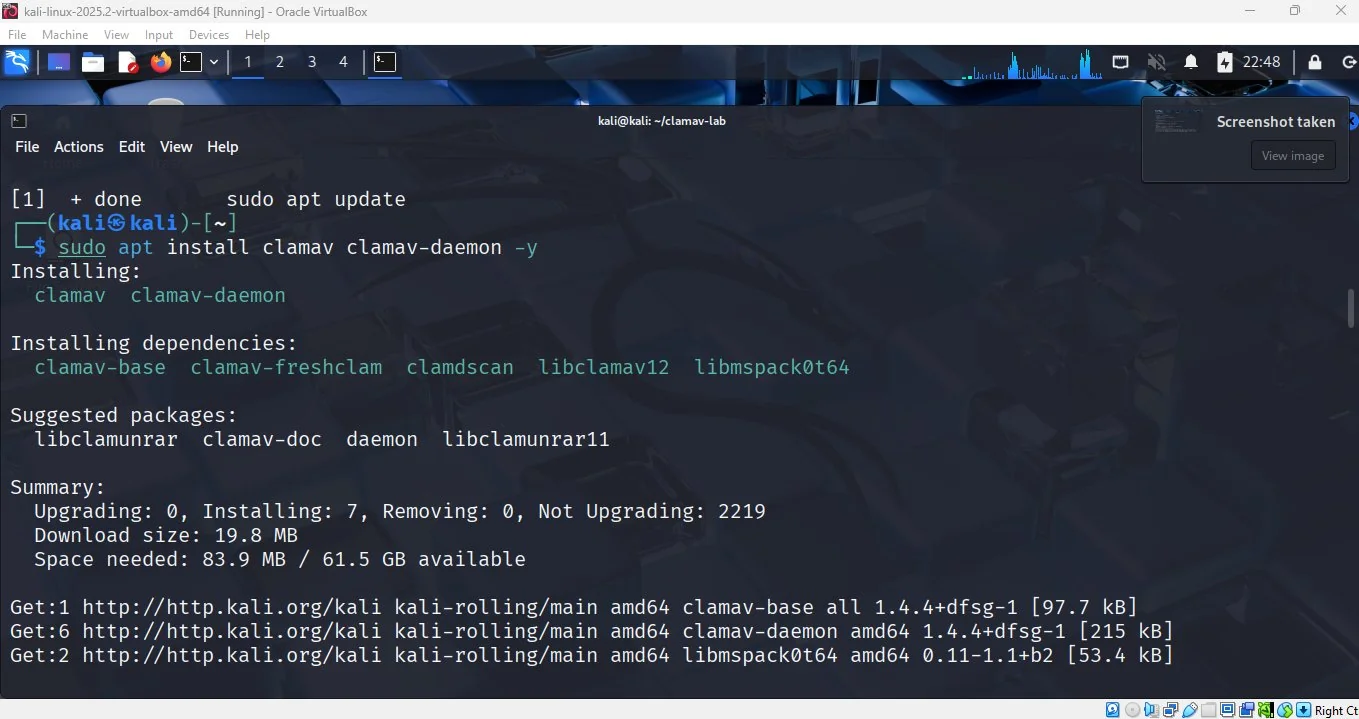
After running sudo apt update again, the installation worked correctly and started downloading the packages:
Update the virus database
After installation, we need to download the latest virus signatures. The ClamAV daemon must be stopped first, otherwise the update will fail with a "lock" error:
sudo systemctl stop clamav-freshclam
sudo freshclam
sudo systemctl start clamav-freshclam
clamscan --version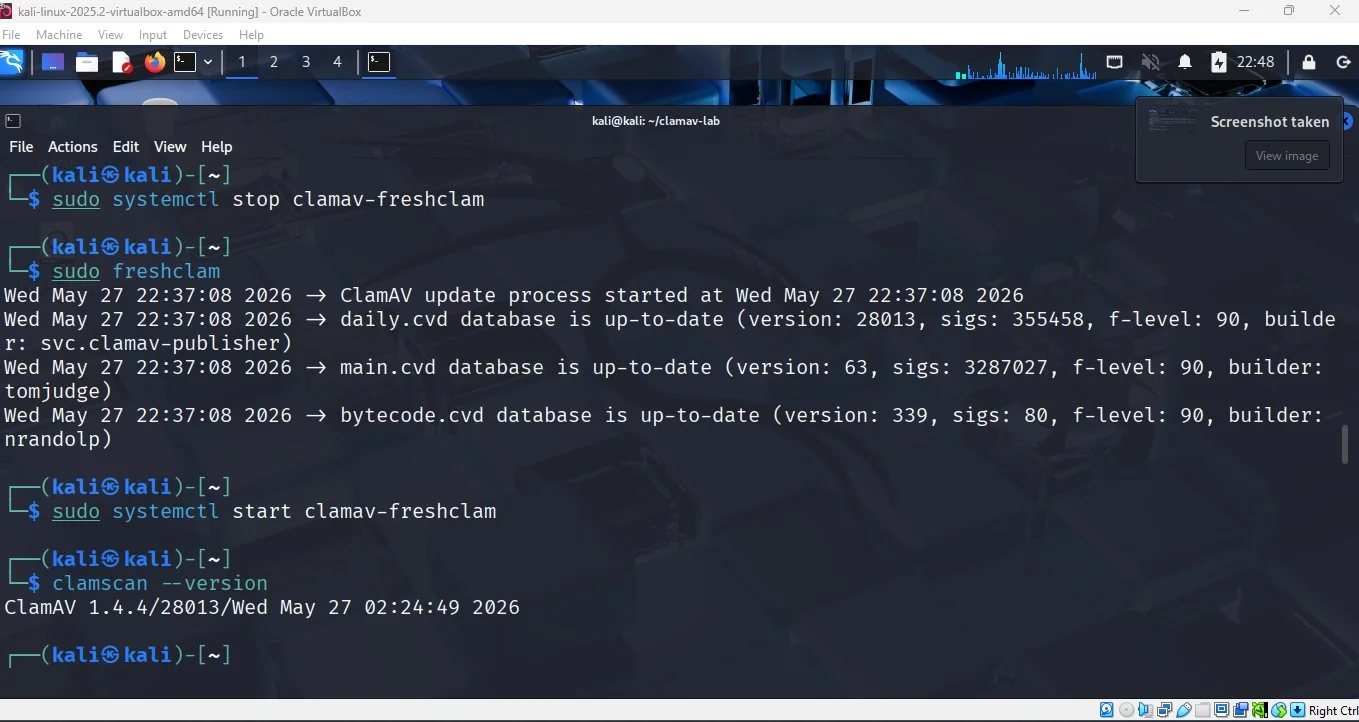
2Create a test folder and two files
Now we will create a new folder for our lab work, then make two files inside it: one fake virus, and one normal clean file.
mkdir ~/clamav-lab
cd ~/clamav-lab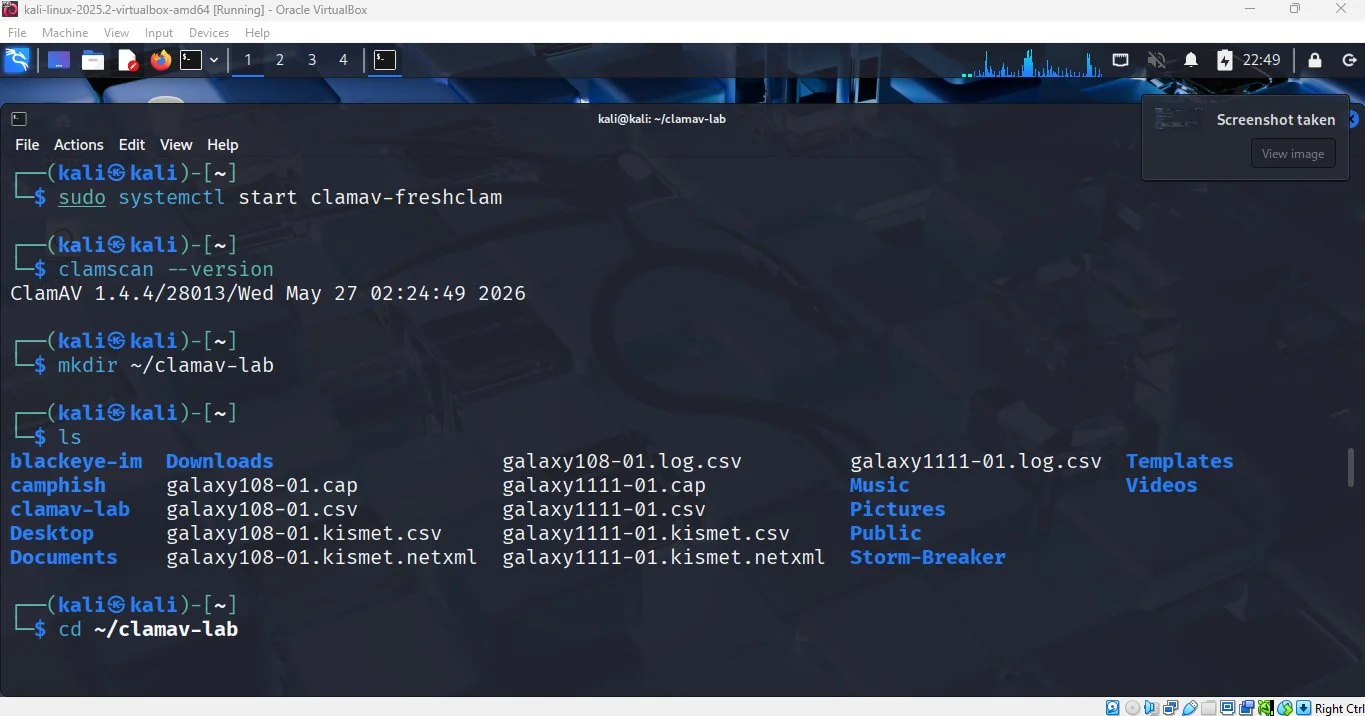
clamav-lab folder is now in our home directory.Create the fake virus file (EICAR)
Type this command exactly as shown. The text inside the quotes is the official EICAR test string:
echo 'X5O!P%@AP[4\PZX54(P^)7CC)7}$EICAR-STANDARD-ANTIVIRUS-TEST-FILE!$H+H*' > fakevirus.txtCreate the clean file
echo "This is a normal clean file for testing." > cleanfile.txt
ls
fakevirus.txt and cleanfile.txt.3Scan the folder
Now we ask ClamAV to scan the whole folder:
clamscan ~/clamav-labClamAV will take about 30 seconds to load its database, then check every file. You will see:
cleanfile.txt: OK— the clean file passed.fakevirus.txt: Eicar-Signature FOUND— the test virus was caught.Infected files: 1in the summary at the bottom.
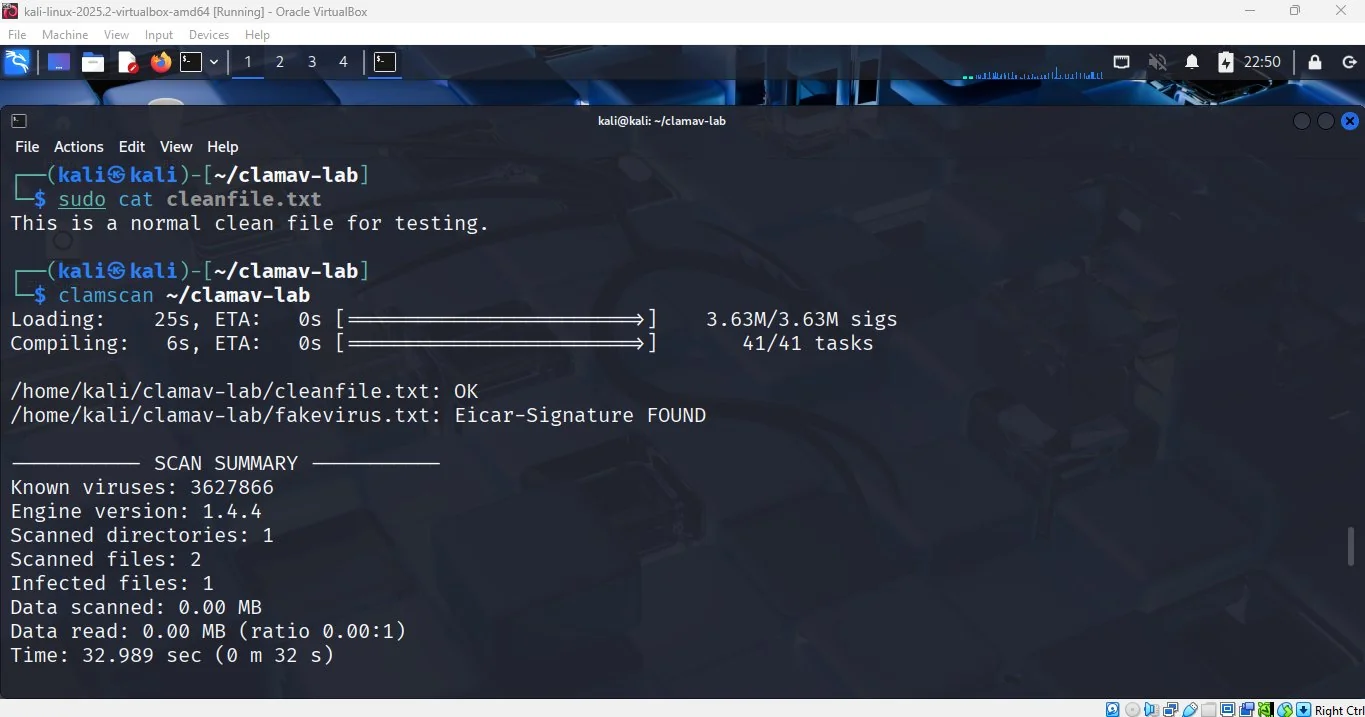
fakevirus.txt and ignored the clean file.4Remove or quarantine the infected file
ClamAV gives us two safe ways to handle an infected file:
Option A — Delete it
clamscan --remove ~/clamav-labOption B — Move it to a quarantine folder (safer)
This is the option I used in the lab. We make a new folder called quarantine, then tell ClamAV to move any infected files there instead of deleting them. This is safer because you can study the file later if needed.
mkdir ~/quarantine
clamscan --move=~/quarantine ~/clamav-lab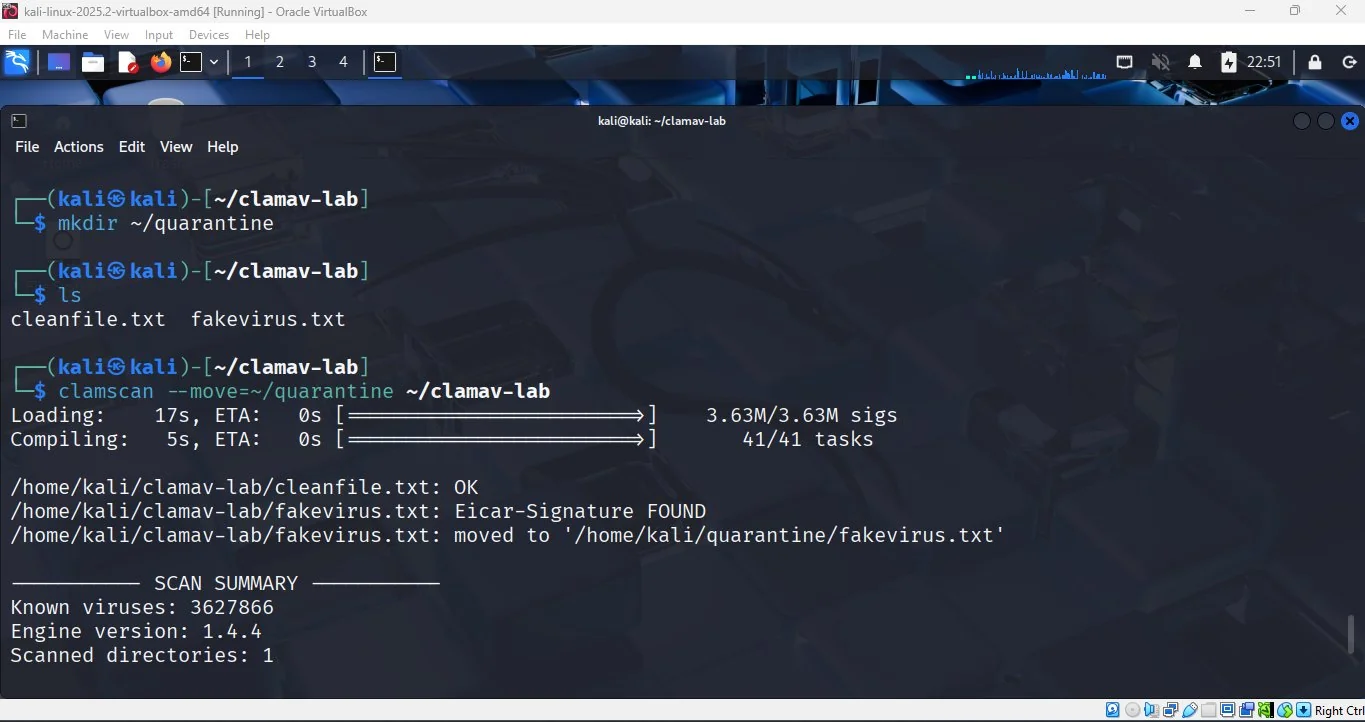
fakevirus.txt to /home/kali/quarantine/.5Scan again to confirm
Finally, we run the scan one more time to make sure the folder is clean:
clamscan ~/clamav-lab
ls
This time we should see Infected files: 0 and only cleanfile.txt remaining in the folder.
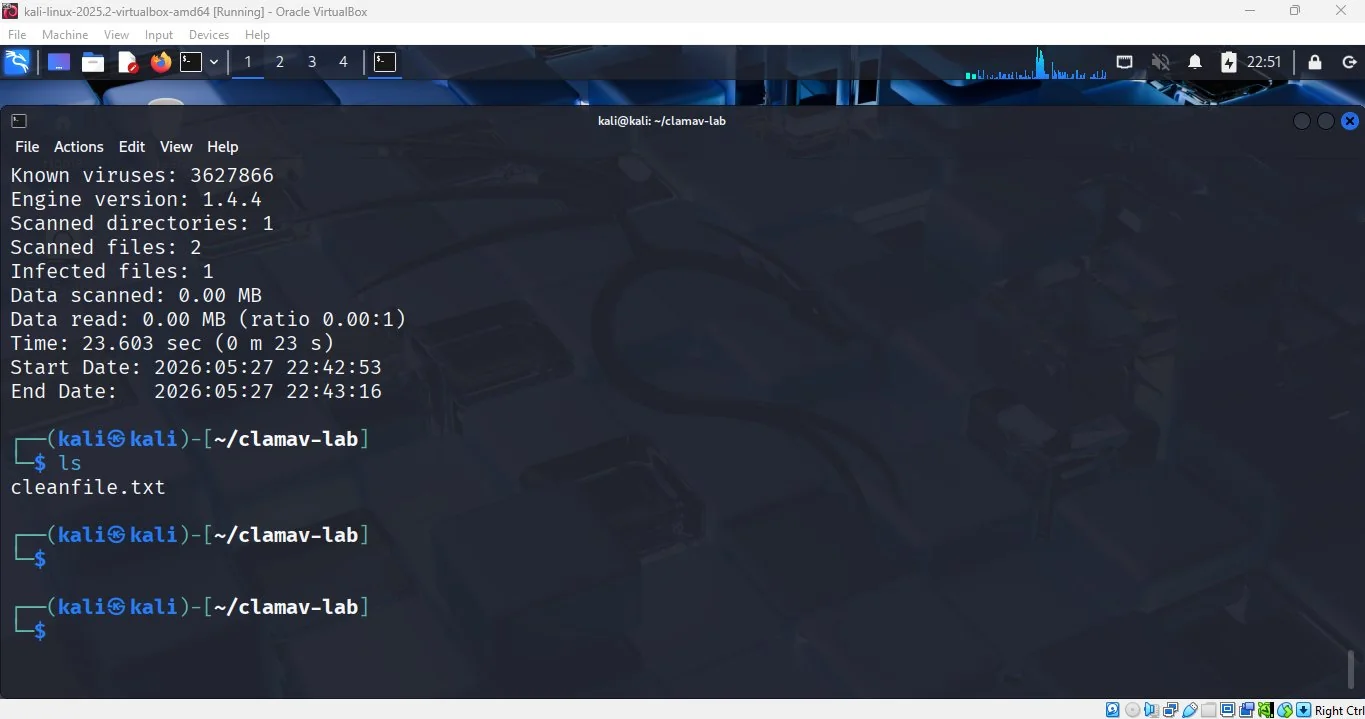
cleanfile.txt is left.🔧 Fixing the "404 Not Found" error
Kali Linux is a "rolling release", which means its packages change all the time. Sometimes the local package list points to an old version that has already been replaced. When this happens, apt install fails with a 404 error.
The fix is simple — refresh the package list and try again:
sudo apt update --fix-missing
sudo apt full-upgrade -y
sudo apt install clamav clamav-daemon -y
If that still does not work, clear the cache completely and refresh:
sudo apt clean
sudo rm -rf /var/lib/apt/lists/*
sudo apt update
sudo apt install clamav clamav-daemon -y
🎯 Conclusion
In this lab, we did five simple things:
- Installed ClamAV on Kali Linux.
- Created a safe test virus file (EICAR) and a clean file.
- Scanned the folder and confirmed ClamAV could spot the virus.
- Moved the infected file to a quarantine folder.
- Scanned again to confirm the folder was clean.
This is the same basic process used in real-world incident response — detect, isolate, verify. The tools may be more advanced in a corporate environment, but the steps are the same. Once students understand this workflow on a simple test file, they are ready to apply the same thinking to bigger problems.